


Aeration of Large Water Bodies: A Complete Guide — From the Causes of Fish Kills to Choosing the Right System
A pond, lake or quarry is not simply a «hole full of water». It is a living system that breathes, ages and dies. The primary indicator of any water body’s health is the level of dissolved oxygen in the water. When oxygen falls too low, the system begins to degrade: fish die, algae bloom, the water starts to smell of mud and hydrogen sulphide. Aeration is the only reliable method of stopping this process and restoring life to the water body.
This article covers everything: why ponds suffocate, how the different types of aeration work, how to calculate the correct system and what mistakes to avoid at start-up.
Part 1. Why Water Bodies Lose Oxygen
Where does the oxygen in water come from
Under natural conditions a water body receives oxygen from two sources:
- From the atmosphere — oxygen dissolves through the water surface. This process is called surface aeration and works more intensively the stronger the wind and wave action.
- From aquatic plants and algae — during photosynthesis they release oxygen into the water during daylight hours. But at night photosynthesis stops and the plants begin to consume oxygen — competing with the fish.
The normal dissolved oxygen level for fish survival — at least 5–6 mg/l. The critical level at which a fish kill begins — below 2–3 mg/l.
Why oxygen disappears
In a large water body, oxygen is consumed continuously — and not only by the fish. The main consumers are:
- Bottom sediments. The beds of most ponds and lakes accumulate a multi-year layer of organic matter — leaf litter, algae residues, fish waste and silt. The bacteria decomposing this organic matter consume enormous quantities of oxygen. In large water bodies this is the biggest single «consumer» — decomposition of the bottom sediment can account for 70–80% of all dissolved oxygen.
- Algae and cyanobacteria. During a «bloom» (eutrophication), algal density at the surface reaches levels that block sunlight from penetrating into the depths. Plants on the bottom die and begin to decompose, consuming oxygen. At night the algae themselves switch from photosynthesis to respiration — the dissolved oxygen level drops sharply just before dawn.
- Thermal stratification. In summer the surface water warms and becomes lighter while cold water sinks to the bottom. Two isolated layers form: the upper layer is saturated with oxygen; the lower layer is completely oxygen-free — anaerobic and dead. Fish are forced to remain only at the surface, suffocating on warm nights.
- Winter ice cover. Ice completely isolates the water body from the atmosphere. Photosynthesis under ice and snow is minimal. Meanwhile bottom bacteria continue to consume oxygen — particularly intensively when there is a rich organic sediment layer. Winter fish kills occur most frequently in February and March.
- Nutrient runoff. Rainwater washes fertilisers from fields, livestock farm effluent and domestic wastewater into water bodies. The nutrients (nitrogen, phosphorus) trigger an explosive algal bloom and accelerate oxygen consumption throughout the ecosystem.
What oxygen depletion looks like
Signs of escalating oxygen deficiency in a large water body:
- Fish «hover» at the surface, especially at dawn — gasping for air at the water surface
- Water turns green or brownish («bloom»)
- A hydrogen sulphide smell appears (rotten eggs) — a sign of anaerobic decomposition on the bottom
- Foam and oily films appear along the shoreline
- Mass fish mortality — fish kill
Part 2. What Aeration Is and How It Works
Aeration of a water body is the forced saturation of water with oxygen using specialised equipment. The aerator’s task is not simply to «produce bubbles» but to organise the mixing of water layers, create permanent circulation and break down thermal stratification.
It is fundamentally important to understand: effective aeration of a large water body is not a surface spray device. It is a bottom or deep-water air injection system that lifts cold bottom water upwards and draws oxygen-rich surface water downwards. This «vertical pump» of air bubbles mixes the entire water body — from the bottom to the surface.
What happens in a water body with correct aeration
- Thermal stratification is broken down. The water mixes, temperature layers equalise. Fish gain access to the entire volume of the water body, not just the surface layer.
- Oxygen reaches the bottom sediments. Aerobic bacteria on the bottom begin to work 5–10 times more efficiently than anaerobic ones. Instead of hydrogen sulphide and methane, carbon dioxide and nitrates are produced — harmless to fish.
- Algal growth is suppressed. Mixing carries algae from the surface into the depths where they lack light. The water bloom stops or significantly diminishes.
- Natural self-purification of the water body accelerates. Aerobic decomposition of organic matter is many times faster than anaerobic. The bottom sediment layer gradually decreases in depth.
- Water quality for fish farming improves. Uniform oxygen distribution throughout the volume allows stocking density to be increased and feed conversion ratio to be reduced.
Part 3. Types of Aeration for Large Water Bodies
1. Bottom (deep-water) bubble aeration — the most effective method
Operating principle: a shore-based compressor forces air through an air hose to diffusers installed on the bottom. The diffusers release millions of small bubbles (0.5–1 mm) that rise slowly from the bottom to the surface.
Why small bubbles are better than large ones: the contact area between air and water in small bubbles is hundreds of times greater than in large ones. A 0.5 mm bubble transfers far more oxygen into the water than a 5 mm bubble of the same air mass. This is why quality diffusers use EPDM membranes with micro-perforations that produce bubbles of precisely the right size.
Advantages of bottom aeration:
- Works throughout the entire volume, including the bottom layer
- Independent of temperature and weather conditions
- The equipment (compressor) is on the shore — accessible for maintenance
- Minimum power consumption at maximum efficiency
- Operates year-round, including under ice
- Does not harm fish
Disadvantages:
- Requires laying air hoses across the bottom
- Efficiency decreases at depths below 1.5 m
2. Surface aeration (fountain type)
A pump draws water from depth and sprays it into the air. The water droplets flying through the air capture oxygen and return to the water body already saturated.
Advantages: decorative effect — a beautiful fountain. Works well in small shallow ponds (depth up to 1.5–2 m).
Disadvantages for large water bodies:
- Saturates only the upper water layer with oxygen — the bottom layer remains anaerobic
- Does not break down thermal stratification
- High power consumption
- The pump is submerged — maintenance is difficult
- Freezes in winter
3. Horizontal mixing (paddle wheel aerators)
Paddle or propeller aerators mix the water horizontally. Used primarily in fish farming ponds with intensive feeding.
4. Natural aeration through wind and waves
In open, unprotected water bodies, wind is sufficient to mix the upper layers. But in large enclosed ponds, quarries and deep lakes wind alone is not enough — it does not reach the bottom layer.
Part 4. Calculating the Bottom Aeration System
The basic formula
For the normal functioning of a water body with fish and plants it is necessary to provide at least 4 complete turnovers of the total water volume per day. That is, the entire volume of water in the body must pass through the aeration zone 4 times in 24 hours.
Formula for calculating the number of diffusers:
Number of diffusers = (Water body volume, m³) × 4 / (Flow of one diffuser, m³/day)
The flow of one diffuser depends on the installation depth. The deeper the installation, the greater the lifting force of the bubbles and the larger the volume of water moved by a single diffuser. For example, a diffuser at a depth of 2.1 m generates a flow of approximately 14,300 m³/day.
Step-by-step calculation example
Given data:
- Water body volume: 22,000 m³
- Average depth: 2.1 m
- Flow of one diffuser at 2.1 m depth: 14,328 m³/day
Calculation:
22,000 m³ × 4 / 14,328 m³/day = 6.1 → round up to 6 diffusers
When to increase the system capacity
| Situation | Recommended turnovers/day | Multiplier |
|---|---|---|
| Standard pond without fish | 4 turnovers/day | ×1.0 |
| Pond with fish (carp, silver carp) | 6–8 turnovers/day | ×1.5–2.0 |
| Swimming pond | 6–10 turnovers/day | ×1.5–2.5 |
| Heavy algal bloom | 8–12 turnovers/day | ×2.0–3.0 |
| Fertiliser-laden runoff entering | 8–12 turnovers/day | ×2.0–3.0 |
| Irregular shape (bays, shallows) | Add diffusers in stagnant zones | +20–30% over calculation |
| Intensive aquaculture | 10–15 turnovers/day | ×2.5–3.5 |
Diffuser placement
- Do not place all diffusers in one location. A single powerful cluster creates good aeration in its own zone but leaves other parts of the water body with no water movement.
- Consider the bottom topography. The deepest points accumulate the most organic matter — place diffusers there first.
- In irregularly shaped water bodies add individual diffusers in «pockets» and bays — water stagnates there even when the main system is running.
- Minimum effective depth for bottom aeration — 1.2–1.5 m.
Part 5. Components of a Bottom Aeration System
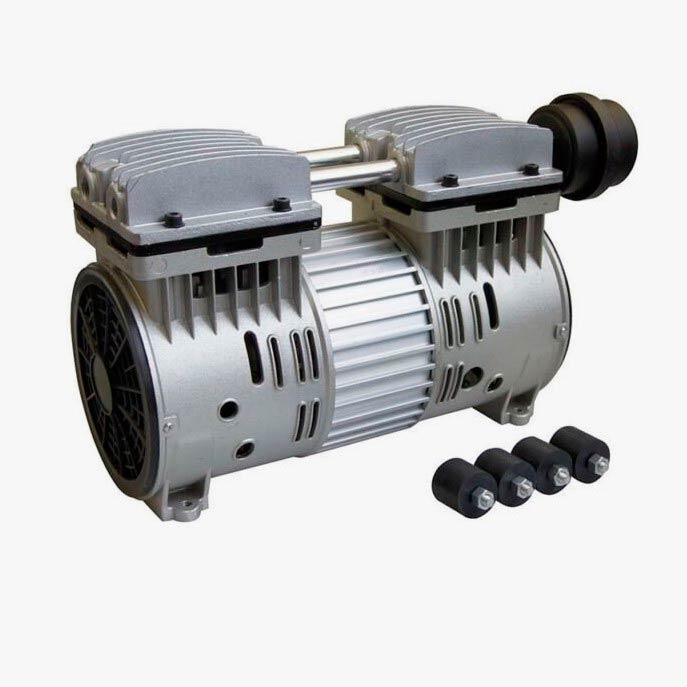
1. The compressor
The heart of the entire system. Pond aeration uses specialised low-pressure, high-volume compressors — not high-pressure industrial compressors used for pneumatic tools.
Requirements for an aeration compressor:
- Working pressure: 0.5–2 bar — sufficient to push air through a 2–5 m water column
- Output: high air delivery in l/min at low pressure
- Duty cycle: continuous (24/7)
- Overload protection: mandatory
- Self-lubricating pistons: eliminate the need for regular oil changes
- Quiet operation: important for recreational and residential areas
2. Air hoses (the distribution line)
- Self-sinking — the special material (reinforced PVC) makes the hose dense enough to sink and lie on the bottom without additional weights
- Cold-temperature resistant — the hose must remain flexible at water temperatures of +1–2 °C
- Standard length 30 m with connectors for extension
- Compatible with standard 1/2″ fittings
3. Diffusers
The key element of the system that actually generates the bubbles:
- EPDM membrane with micro-perforations — produces 0.5 mm bubbles. Tubular form provides greater membrane area than disc-type equivalents
- Self-cleaning design — when pressure is released the membrane contracts and expels algae and sediment from the pores
- Multiple diffusers on one base — typically 4 tubular diffusers of 175 mm each
- High-density polyethylene (HDPE) base — strong and chemically inert
- Self-sinking — the hollow base fills with water and sinks without ballast
- Carrying handles — for easy retrieval from the bottom during servicing
Part 6. Rules for Starting Up the Aeration System
Why you cannot run the aerator at full power from day one
Picture a water body with years of bottom sediment and a dead anaerobic bottom layer. That layer has accumulated a vast store of toxic products of anaerobic decomposition: hydrogen sulphide, ammonia, methane, ferrous iron.
If a powerful aeration system is switched on abruptly, all of this «chemical arsenal» will instantly rise from the bottom and mix throughout the entire water volume. Toxin concentrations in the water will spike sharply — and the fish will die not from lack of oxygen but from poisoning, at the very moment you were trying to save them.
The correct start-up sequence
| Day / period | Run time | What happens |
|---|---|---|
| Day 1 | 15 minutes | First «awakening» of the bottom layer. Minimal toxin release — fish are unaffected |
| Day 2 | 1 hour | Aerobic bacteria begin to activate |
| Days 3–5 | 2–4 hours | Gradual layer mixing. Toxins are neutralised by aerobic processes |
| Days 6–10 | 6–12 hours | Dissolved oxygen in the bottom layer begins to rise |
| Weeks 2–4 | 18–22 hours | System reaches operating regime |
| From week 4 | Continuous 24/7 | Full aeration of the entire volume |
Signs of a correct start-up
- In the first few days some turbidity and a mild odour are possible — this is normal: suspended matter is being lifted from the bottom
- After 1–2 weeks the water begins to clear
- After 3–4 weeks a significant reduction in algal bloom is noticeable
- Fish stop hovering exclusively at the surface
- After 1–2 months the water is noticeably cleaner and clearer
Best time of year to start up
Spring or early autumn — when the water body is not overheated and the toxin level in the bottom layer has not yet reached its summer peak. A mid-summer start-up is possible but requires doubling the gradual introduction period.
Part 7. Aeration System Maintenance
The compressor
- Cleaning the intake filter — every 2–4 weeks. A clogged filter reduces air delivery and increases motor load
- Checking the housing and ventilation — monthly
- Inspecting the air hoses — once per season
The diffusers
Quality self-cleaning diffusers generally require no regular maintenance. If system output drops (the visible water upwelling above the diffuser visibly diminishes), partial membrane clogging may have occurred. Lift the diffuser from the bottom, rinse the membrane with clean water under pressure. If the membrane has lost elasticity or is damaged — replace it.
Winter operation
- Do not shut down the system for winter — operating diffusers prevent the water above them from freezing, maintaining an open area in the ice for gas exchange
- Monitor the compressor in hard frosts — the housing must be protected from condensate freezing
- Do not block the open water area — carbon dioxide and other metabolic gases escape through it
Part 8. Common Mistakes in Aerating Large Water Bodies
| Mistake | Consequences | How to avoid |
|---|---|---|
| Running at full power from day one | Fish kill from bottom toxins | Gradual start-up: 15 min → 1 h → 4 h → 24/7 |
| Too few diffusers | Only part of the body is aerated, stagnant zones remain | Accurate calculation with a 20–30% buffer |
| All diffusers in one spot | Part of the body unaerated, uneven bloom | Even distribution across the bottom area |
| Compressor not rated for continuous duty | Overheating and failure | Use only compressors rated for continuous operation |
| Neglecting the intake filter | Reduced air delivery, overheating, failure | Clean filter every 2–4 weeks |
| Shutting down for winter | Winter fish kill, ice lock, fish deaths | Continuous 24/7 operation year-round including winter |
| Diffusers placed in shallow water (under 1.2 m) | Low efficiency — bubbles do not have time to transfer oxygen | Install at a minimum depth of 1.5 m |
| Expecting instant results | Disappointment, premature system shutdown | Full effect takes 4–8 weeks of continuous operation |
Part 9. Answers to Frequently Asked Questions
❓ How quickly will the system produce results?
The first visible changes appear after 2–4 weeks: the water begins to clear and the bloom diminishes. The full effect — stable oxygen levels throughout the volume, clean water, healthy fish — takes 1–3 months of continuous operation. The speed depends on the initial condition of the water body: the greater the accumulated bottom sediment, the longer the normalisation process.
❓ Should aeration be switched off at night to save electricity?
No, and this is critically important. Oxygen levels drop precisely at night — when photosynthesis stops and all living organisms and bottom bacteria continue to respire. The minimum oxygen level occurs just before dawn. That is when fish kills happen. Switching off aeration at night completely negates its benefit.
❓ Can an ordinary compressor from a pneumatic tool system be used?
No. Industrial piston compressors for pneumatic tools are designed for pressures of 8–16 bar and short-duty operation. Aeration requires pressures of 0.5–2 bar and continuous operation. Using a high-pressure unit for aeration is either inefficient (most of the energy is wasted) or leads to rapid equipment wear in an unsuitable operating regime.
❓ What should be done with a water body where a fish kill has already started?
Emergency measures: maximise surface mixing using whatever pumps and boat motors are available. Create the maximum possible surface agitation. At the same time install and gradually start up a bottom aeration system. In a critical situation emergency oxygen supply from cylinders is possible, but this is a temporary measure that does not resolve the problem systematically.
❓ How much electricity does an aeration system consume?
It depends on the size of the water body. A compressor for a 6-diffuser system consumes approximately 1.5–3 kW. At continuous operation (24/7) this is 36–72 kWh per day or 1,100–2,200 kWh per month. For a 22,000 m³ water body these are quite acceptable costs — far less than restocking after a fish kill or dredging the bottom sediment.
❓ Does aeration replace bottom sludge removal?
Not completely, but it significantly slows sludge accumulation. With continuous aerobic aeration, the rate of organic matter decomposition is 5–10 times higher than under anaerobic conditions. This means the bottom sediment gradually «burns down» and its depth decreases. In heavily silted water bodies (sludge layer over 50–70 cm), mechanical dredging is recommended first, followed by installation of an aeration system to maintain the improved condition.
Summary: the essentials of aerating large water bodies
- Bottom bubble aeration is the most effective method for water bodies deeper than 1.5 m
- The baseline standard — 4 complete water volume turnovers per day; for fish farming and swimming — 6–12 turnovers
- Calculation: (water body volume) × 4 / (flow of one diffuser) = number of diffusers
- Start-up — strictly gradual: 15 minutes on day one, ramping up over 2–4 weeks
- The system runs continuously, around the clock, year-round — including under ice
- Maintenance is minimal: clean the compressor intake filter every 2–4 weeks
- Results are visible after 2–4 weeks; full effect after 1–3 months