












Why Graphite Vanes Break in Vacuum Pumps: Causes, Diagnostics, Prevention

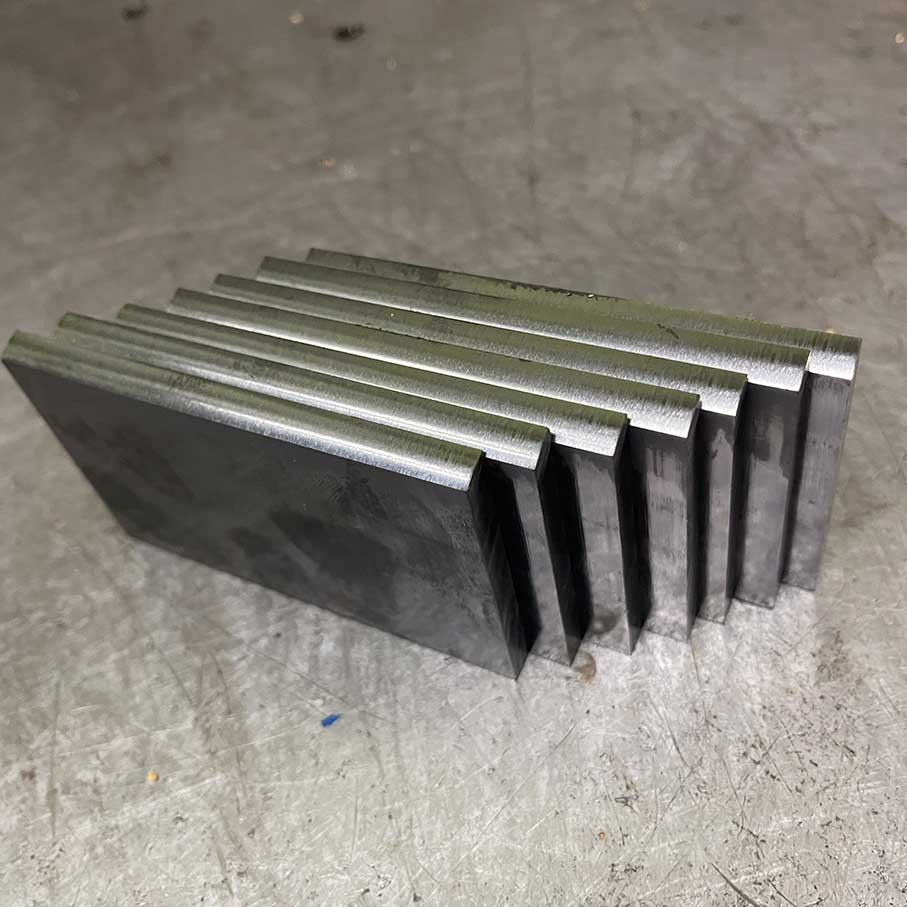
Graphite vanes in dry rotary vane vacuum pumps and compressors (Becker, Rietschle/Busch, Orion, and similar) are a consumable part that should wear down gradually and evenly into fine graphite dust, which itself acts as a dry lubricant. Cracking, chipping, or complete failure of a vane is never random — it’s always the result of one of six typical deviations from normal operation: excessive wear, contamination, moisture or oil ingress, bearing wear, overheating, or installation errors.
Why This Matters for Production
A vacuum pump in a production line isn’t an auxiliary component — it’s part of the process itself, creating the vacuum needed to hold, feed, or secure material. A sudden vane failure means not just pump downtime, but also:
- a line stoppage mid-cycle;
- risk of graphite fragments scoring the stator bore and end covers, turning a €50 repair into a several-hundred-euro overhaul;
- vacuum loss at the exact working moment — meaning process failure or scrap even before the actual breakage, as an early warning sign.
Understanding the causes of wear is therefore not theory — it’s direct savings on downtime and major overhauls.
How Graphite Vanes Work: A Brief Overview
Vanes slide freely in the rotor slots and press against the inner surface of the stator (an eccentrically positioned cylinder) under centrifugal force. Friction against the stator bore constantly wears away a thin layer of graphite — this dust itself provides lubrication, since the pump runs oil-free. That’s why a healthy pump always has a black graphite coating inside the chamber — this is normal and expected, not a sign of failure.
Main Causes of Graphite Vane Breakage
1. Exceeding the Wear Limit (Critical Height)
As the vane wears, its height decreases. When it extends beyond the rotor slot past the allowable limit (typically more than 20–30% of the original height):
- the lever arm of the applied force increases;
- the vane begins to tilt in the slot during rotor rotation and breaks instantly under bending load.
How to recognize it: gradual drop in residual vacuum with a healthy motor and clean filter, increasing noise and vibration 1–2 weeks before failure.
2. Contamination with Production Dust
In dusty workshop environments, the air is saturated with fine particulates.
- if the air filter is damaged, replaced late, or installed incorrectly, dust enters the working chamber;
- accumulating in the rotor slots, it blocks free vane movement — the vane sticks in the slot, then, when suddenly released by centrifugal force, strikes the stator wall and breaks.
How to recognize it: a whitish or grayish coating mixed with graphite dust inside the chamber (normally the coating should be uniformly black); vanes move stiffly in the slots instead of freely under their own weight.
3. Moisture or Oil Ingress
Graphite pumps are strictly designed for dry running.
- moisture (condensation) turns dry graphite dust into a dense paste that clogs the rotor slots;
- oil — even microscopic droplets from the surrounding environment or nearby equipment — cements the graphite dust together, causing seizure.
How to recognize it: dust inside the chamber is clumped and paste-like rather than free-flowing; the pump is installed near an oil-lubricated compressor or in an area with high humidity/temperature swings.
4. Bearing Wear and Rotor Radial Play
As bearing life is exhausted, the rotor shifts off its central axis.
- runout and misalignment develop between rotor and stator;
- vanes experience micro-impacts passing through the intake and discharge ports, leading to edge chipping and eventual complete failure.
How to recognize it: noticeable shaft play when rocked by hand (pump switched off and disconnected), a rumbling noise at idle, uneven vane wear.
5. Overheating of the Working Chamber
Overheating results from a clogged inlet filter, operation at limit vacuum/pressure without a safety valve, or restricted cooling (dirty housing fins, a faulty fan).
- thermal expansion of the metal reduces clearances in the rotor slots, pinching the graphite vane in place.
How to recognize it: the pump housing is hotter than usual to the touch (check after shutdown, and carefully), a smell of burnt graphite, the cooling fan not spinning or spinning slowly.
6. Installation Errors and Low-Quality Components
- incorrect orientation: if a vane has a manufactured chamfer, installing it backwards causes improper contact with the stator bore and chipping at the very first startup;
- poor-quality alternatives: counterfeit or cheap graphite lacks the necessary density, bending strength, and impregnation structure, causing it to fail at standard operating temperatures.
How to recognize it: failure occurs within the first hours of operation after replacement — this is almost always an installation error or a material defect.
Summary Table: Cause → Sign → Action
| Cause | Visible Sign | Action |
| Wear limit exceeded | Gradual vacuum drop, rising noise | Planned replacement per the pump’s spec sheet dimension |
| Dust contamination | Gray/whitish coating, stiff vane movement | Replace filter, clean rotor slots |
| Moisture/oil | Paste-like clumped dust in chamber | Eliminate the moisture/oil source, flush the chamber |
| Bearing wear | Shaft play, noise, uneven wear | Replace bearings, check alignment |
| Overheating | Hot housing, burnt smell, poor cooling | Clean fins, check fan and safety valve |
| Installation/defect | Failure within first hours after replacement | Check orientation, use certified vanes |
How to Choose Replacement Vanes to Avoid Repeat Failure
- Exact dimensional match. Length, width, height, and edge radius must match the original to within tenths of a millimeter — an oversized clearance accelerates impact loading, an undersized one causes seizure.
- Correct graphite grade. Density and binder impregnation must match the specific pump model’s operating temperature and speed — there’s no universal graphite grade that fits everything.
- Full-set replacement. All rotor vanes are replaced at the same time, never one at a time — differing residual wear unbalances the rotor and creates vibration.
- A verified supplier. Quality differences between production runs of the same brand happen even with well-known manufacturers — it’s worth sourcing components from a supplier specialized in that specific pump brand.
Expert Opinion: Vitali Bolucevschi
“Nine out of ten calls about chipped vanes aren’t actually a defect in the vanes themselves — they’re a missed early warning sign: stiff movement in the slot, unusual noise, a 10–15% drop in vacuum. The pump almost always ‘warns’ several days before failure. My advice: set up a short checklist for the operator each shift — turn the rotor by hand and check residual vacuum on the gauge. It takes a minute, but it saves the cost of a new stator.”
Checklist for Preventing Failures
Main rule: replace vanes as a complete set, rather than waiting for spontaneous failure — graphite fragments from a break often damage the stator bore and end covers.
- Monitor height: regularly measure vane width/height and replace them once the minimum size specified in the pump’s spec sheet is reached.
- Watch the filters: blow out and replace the intake air filters every 500–1,000 hours (depending on how dusty the workshop is).
- Flush the chamber at replacement: when fitting new vanes, always clean the rotor slots of old graphite dust and buildup using dry compressed air or a specialized cleaner (oil-free).
- Check free movement: before restarting after maintenance, turn the rotor by hand via the cooling fan — the vanes should move freely under their own weight.
- Keep a running-hours log: record operating hours and the date of the last replacement — this allows planned maintenance instead of reacting after a failure.
Frequently Asked Questions
How long do graphite vanes usually last?
Service life depends heavily on workshop dust levels and duty cycle, but with proper maintenance (clean filters, dry air, wear monitoring), vanes typically deliver several thousand hours before a planned replacement.
Can vanes from a different manufacturer be used instead of the original?
Technically yes, but only if the geometry and graphite grade exactly match the pump’s spec sheet values — a mismatch in material density or thickness tolerance is a frequent cause of premature failure, as noted above.
Is it normal for the inside of the pump to be covered in black dust?
Yes, a uniform black graphite coating is the expected result of dry lubrication at work. The warning sign isn’t the coating itself, but its color (gray, whitish) or texture (clumped, paste-like).
What should be done if a vane has already broken inside the pump?
You can’t simply install a new vane in place of the broken one — fragments almost always scratch the stator bore. The pump must be fully disassembled, all fragments removed, the stator inspected for scoring, and only then should the full vane set be replaced.
How often should the vane set be changed?
The exact interval depends on the pump model and operating conditions, but the benchmark is planned replacement once the minimum height from the spec sheet is reached — not a calendar schedule. That’s why periodic visual inspection matters more than a fixed interval.